Ramp Network iOS SDK
Ramp Network iOS SDK is a library that allows you to easily integrate Ramp Network into your iOS app and communicate with it.
Integration
There are two ways to integrate Ramp Network into your project: Swift Package Manager and Cocoapods.
Swift Package Manager
Show/Hide Swift Package Manager integration details
-
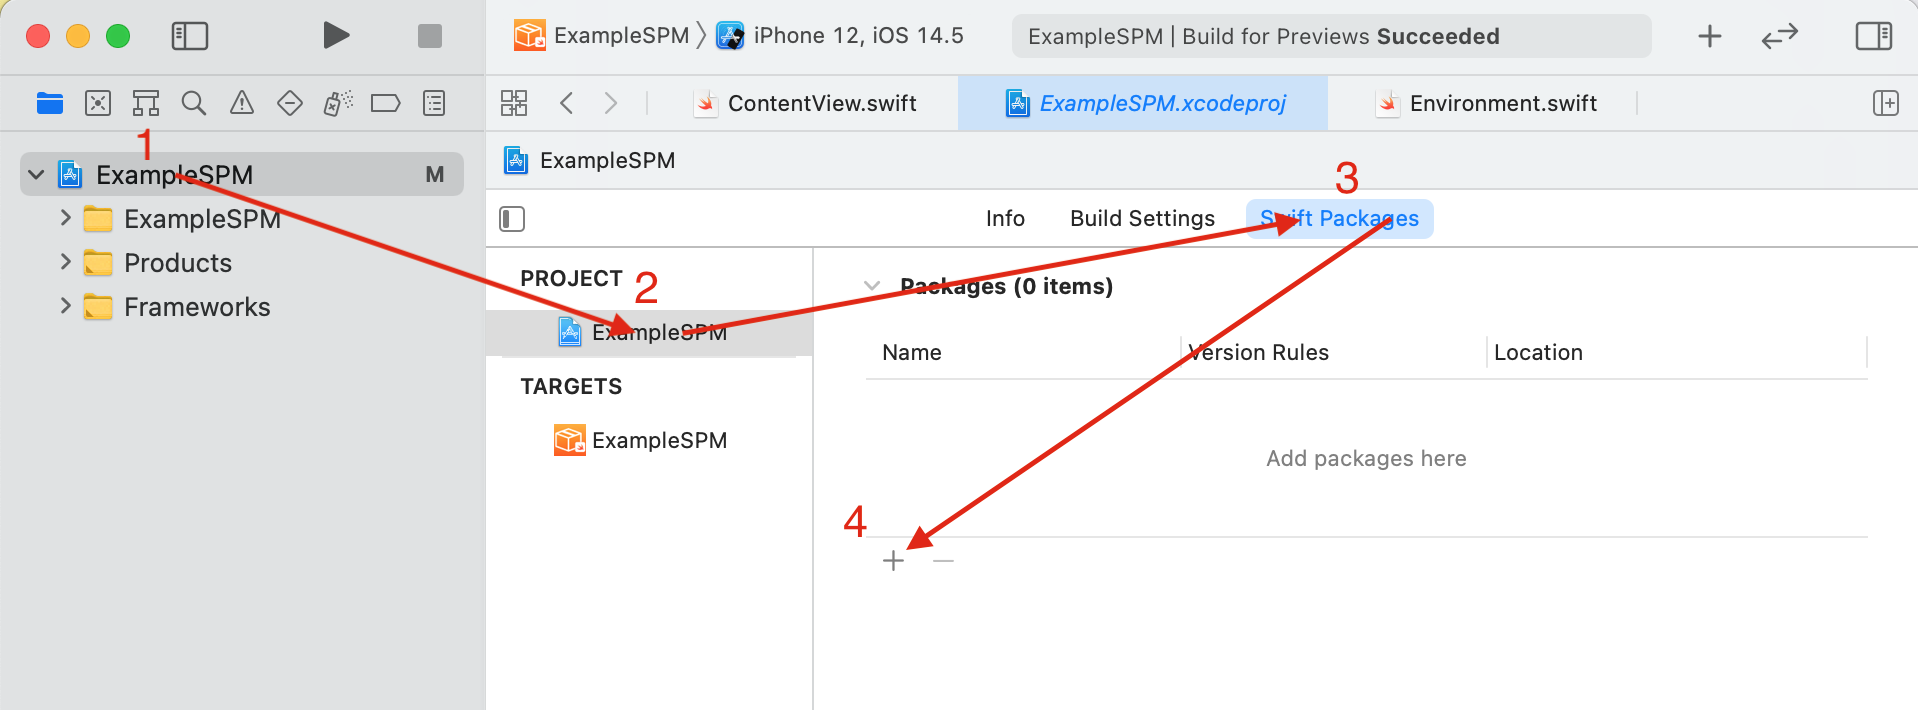
Find your project in Xcode Navigator.
-
Select your project from projects and targets list.
-
In project details, switch to Swift Packages tab.
-
Click on a plus sign in the bottom left corner.
-
In Choose Package Repository window, paste Ramp Network iOS SDK Github reference into the text field.
https://github.com/RampNetwork/ramp-sdk-ios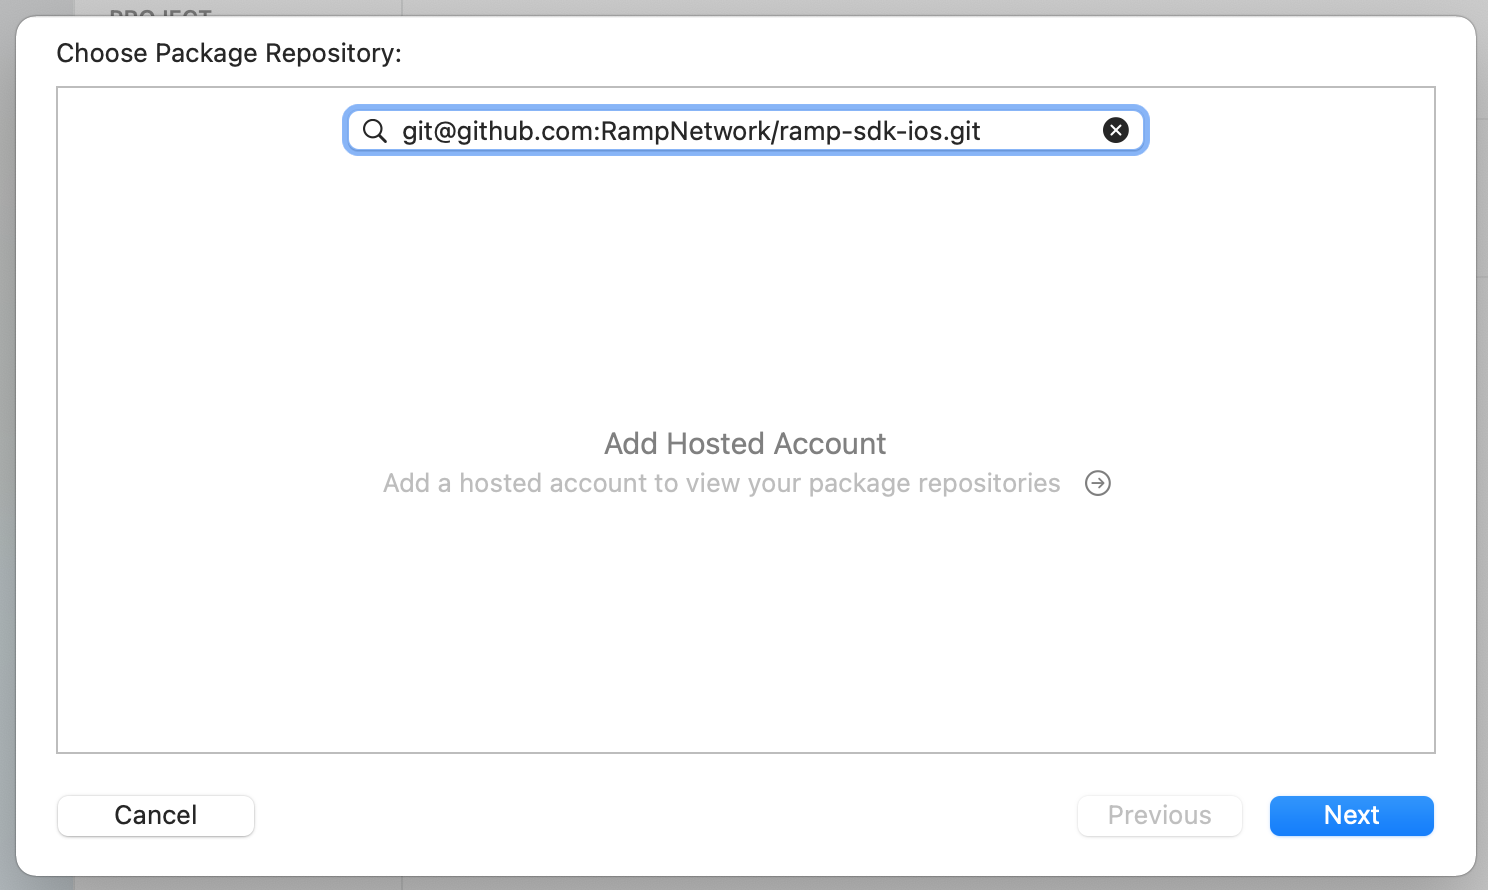
-
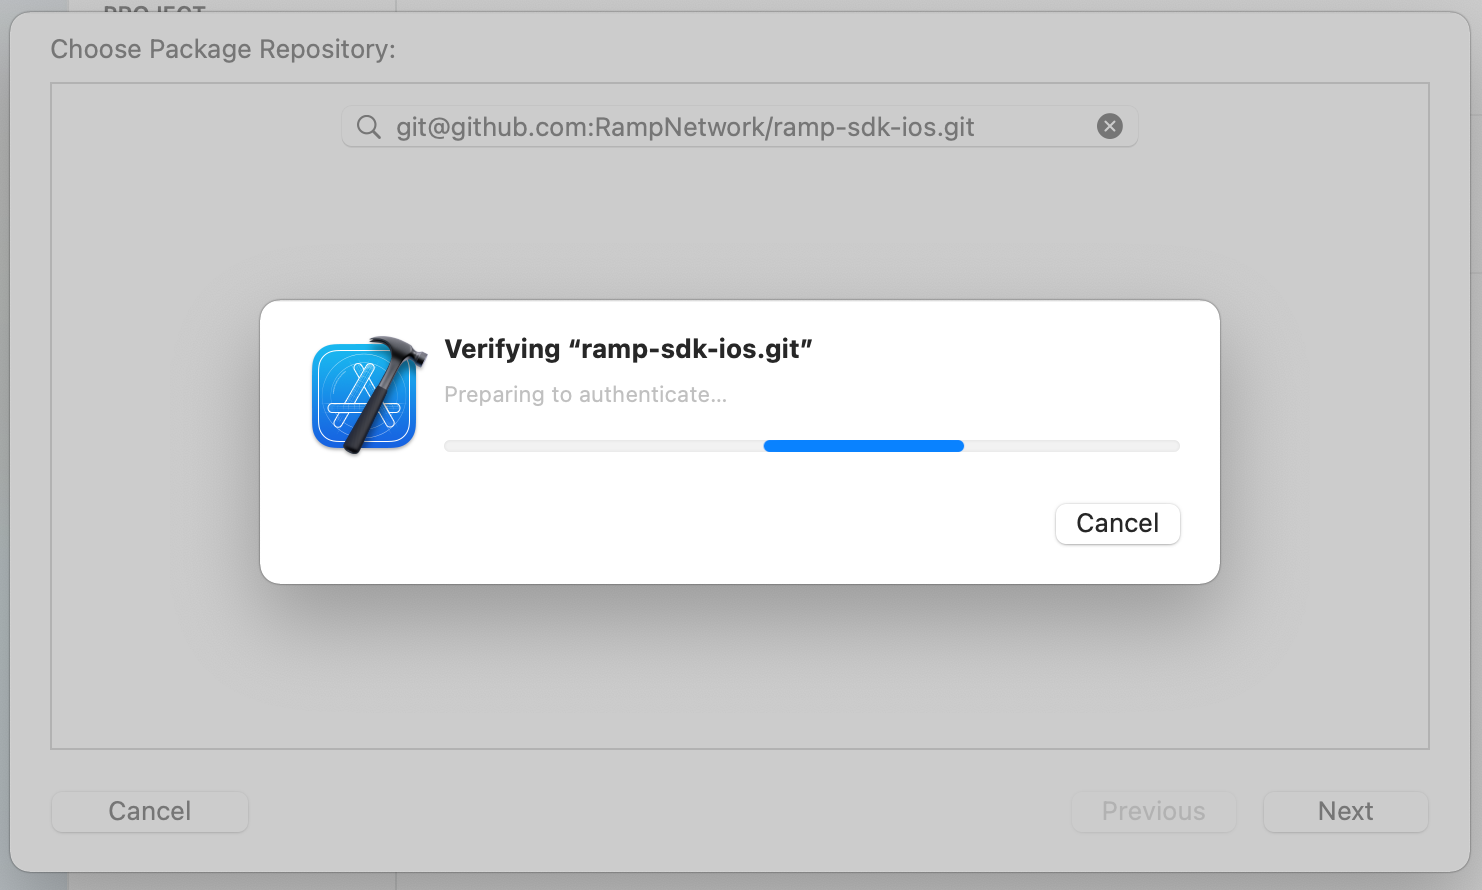
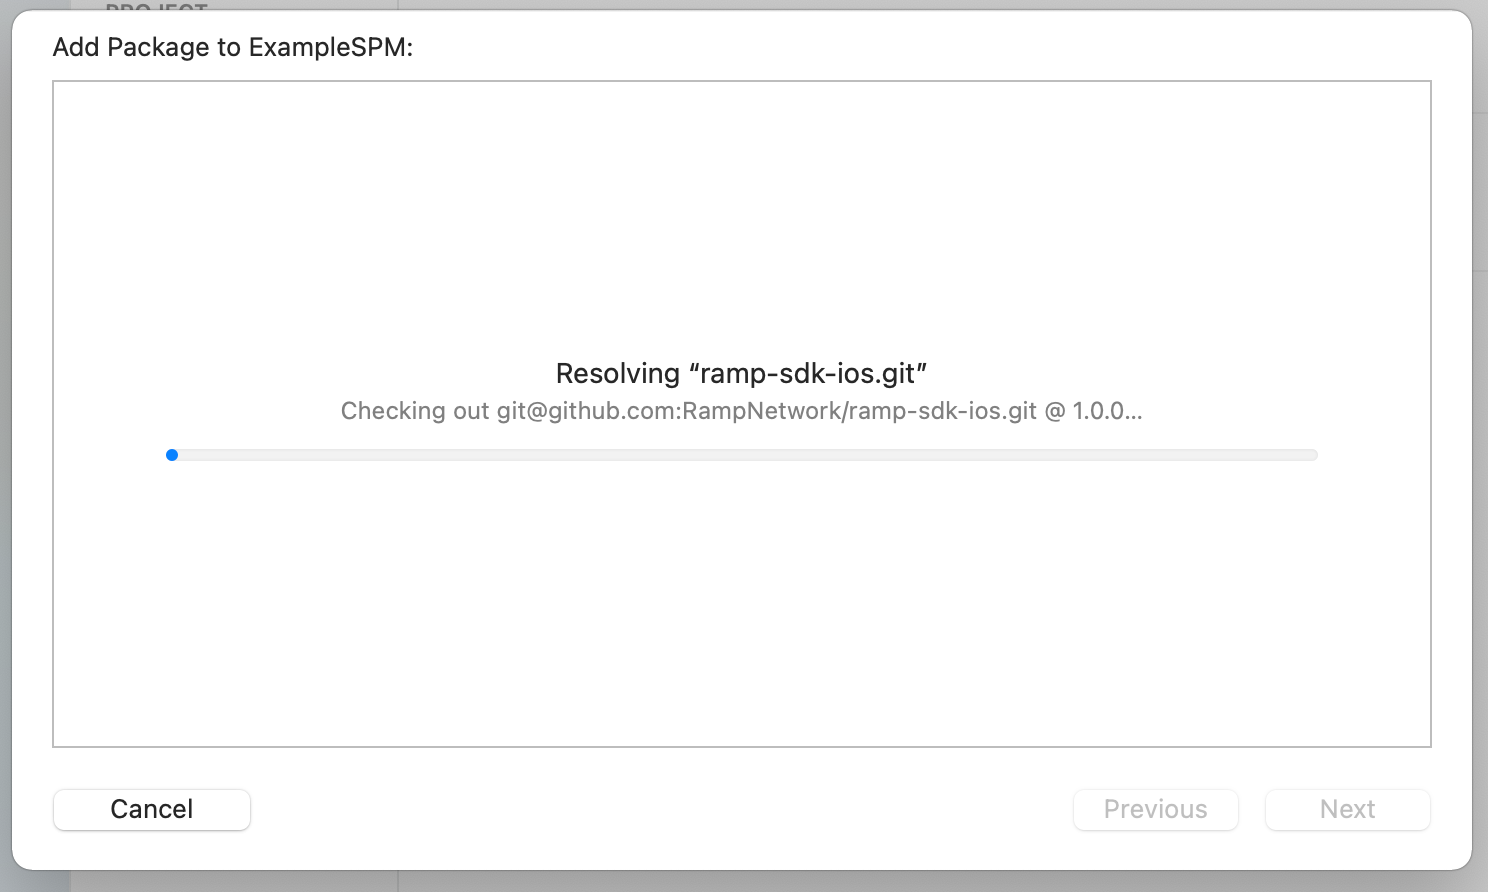
Click Next. Swift Package Manager will now verify the package.
-
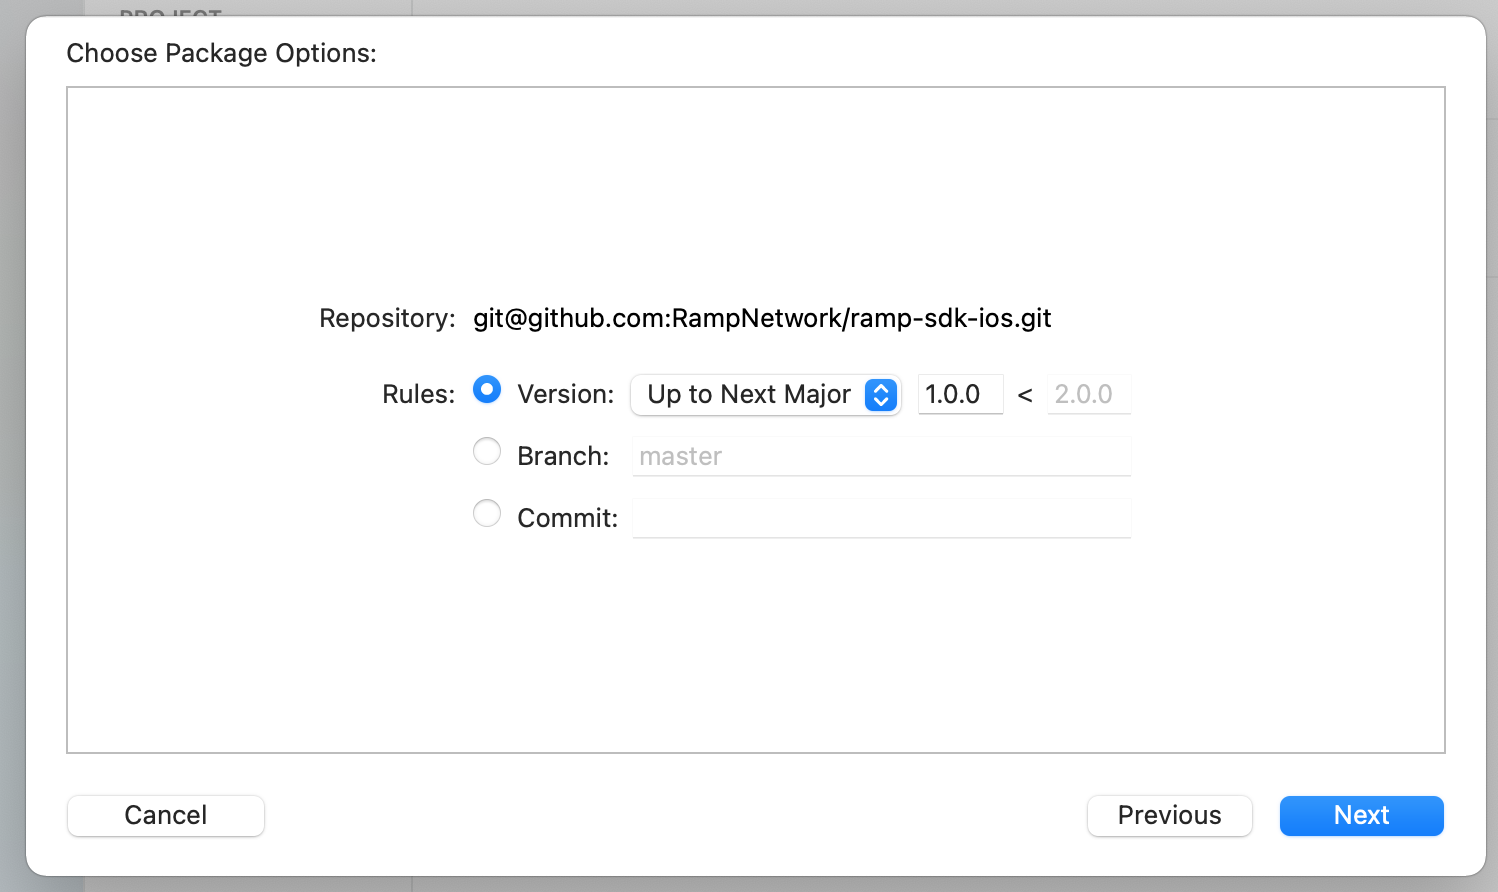
Swift Package Manager will choose the most up-to-date version of the package. You can change it, by providing version, branch or commit you need.
-
Click Next. Swift Package Manager will now resolve the package with all its dependencies.
-
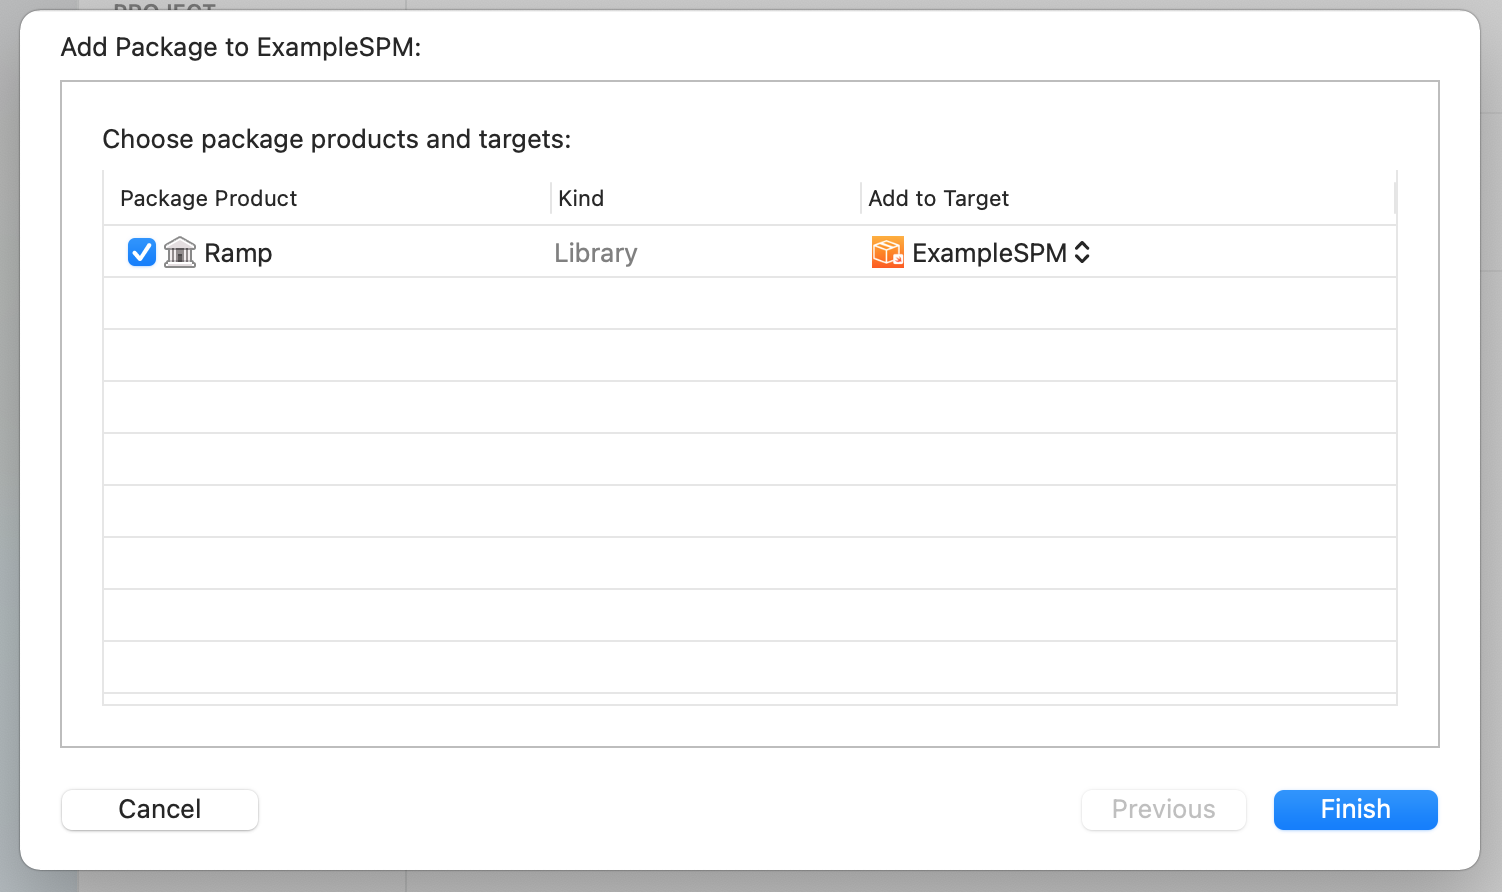
After resolving, Swift Package Manager will let you choose all the targets to add the package to.
-
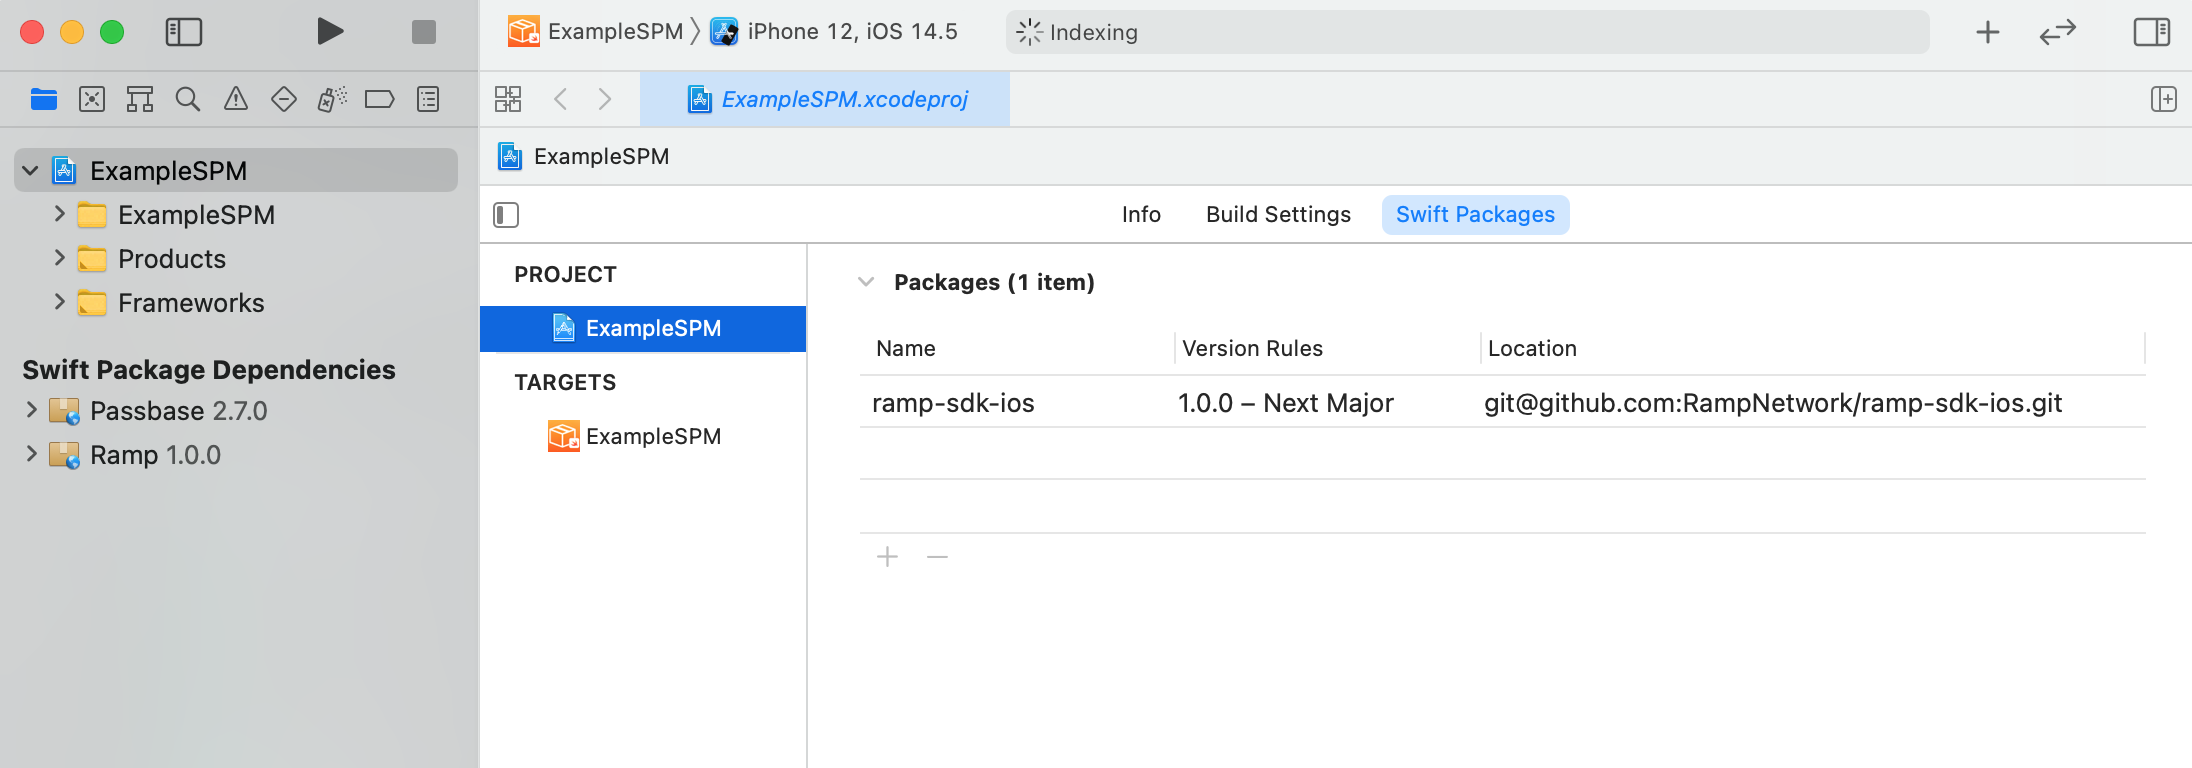
Click Finish. Now you should see Ramp Network package listed under Swift Packages and be able to use it in your code.
Swift Package Manager issues
Sometimes Swift Package Manager may fail to resolve the package and/or its dependencies. If this happens, close Xcode, delete the DerivedData folder to clear Swift Package Manager's cache, and add the package again.
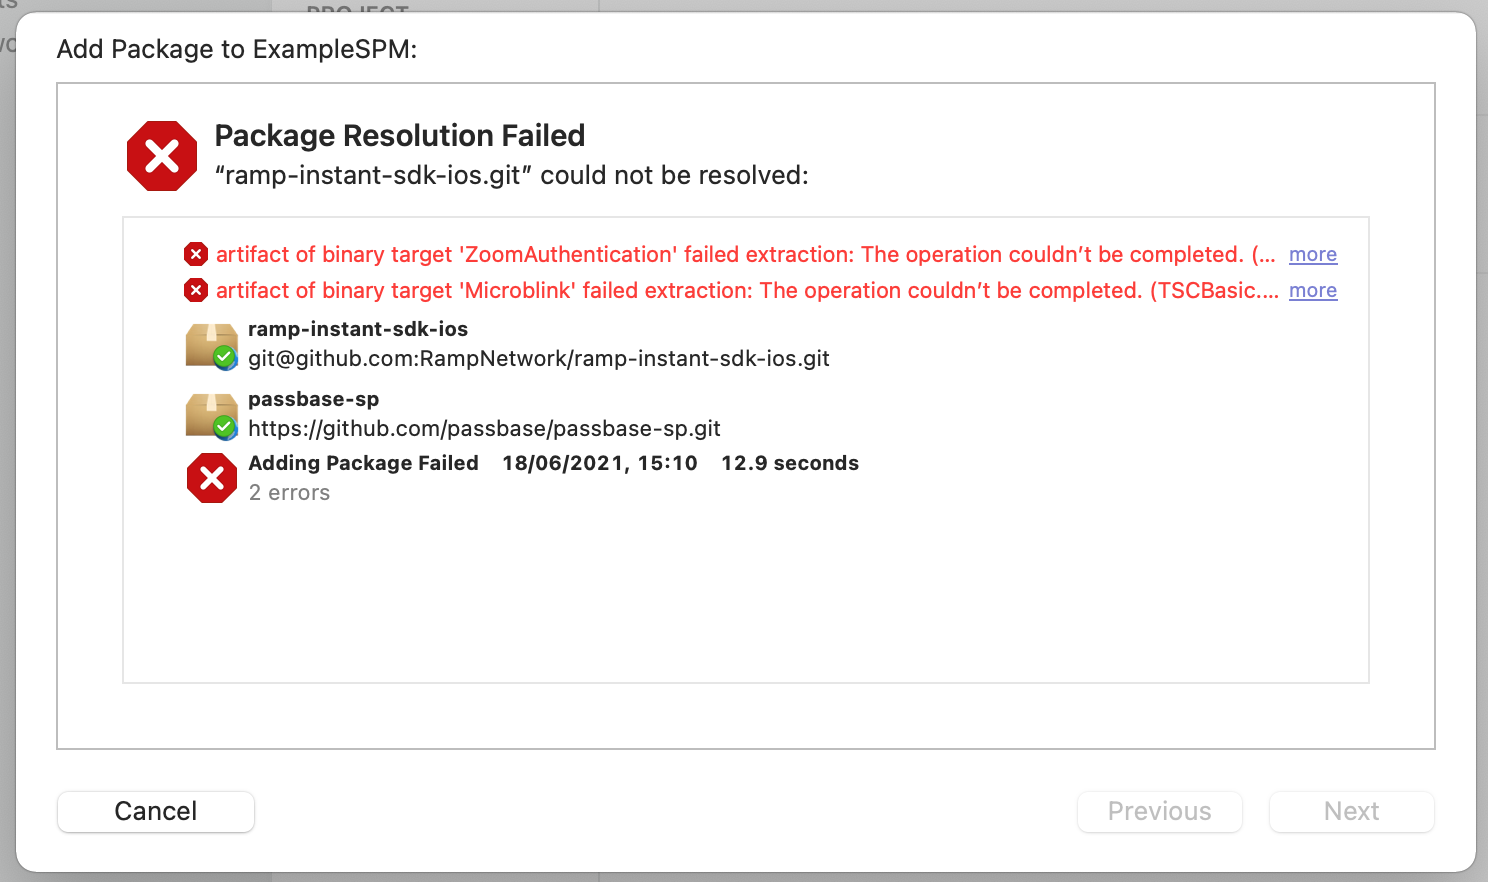
If you don't know how to do it, there is a very useful app called DevCleaner to help you with this exact task.
Cocoapods
Show Cocoapods integration details
-
Make sure you have Cocoapods installed. To install Cocoapods, refer to Cocoapods Documentation.
-
If your project doesn't have a Podfile, create it in the root directory of your project and paste the following code into it. Remember to change
targetname to the one you are using. -
If you already use Cocoapods in your project, add the following sources and the Ramp Network pod reference to proper
targetsections.platform :ios, '11.0'
inhibit_all_warnings!
source 'https://github.com/CocoaPods/Specs.git'
target 'ExampleCocoapods' do
use_frameworks!
`pod 'Ramp', :git => 'https://github.com/RampNetwork/ramp-sdk-ios', :tag => 'SDK_VERSION'`
endGet the newest
SDK_VERSIONfrom https://github.com/RampNetwork/ramp-sdk-ios/releases. -
Open the Terminal app, go to root directory, and type
pod install. Cocoapods will download Ramp Network library and all its dependencies and then create a.xcworkspacefile, which from now on you should use to open your project (if you're not doing it already).$ pod install
Analyzing dependencies
Pre-downloading: `Ramp` from `https://github.com/RampNetwork/ramp-sdk-ios`, tag `v4.0.0`
Downloading dependencies
Installing Ramp (4.0.0)
Generating Pods project
Integrating client project
[!] Please close any current Xcode sessions and use `ExampleCocoapods.xcworkspace` for this project from now on.
Pod installation complete! There is 1 dependency from the Podfile and 4 total pods installed. -
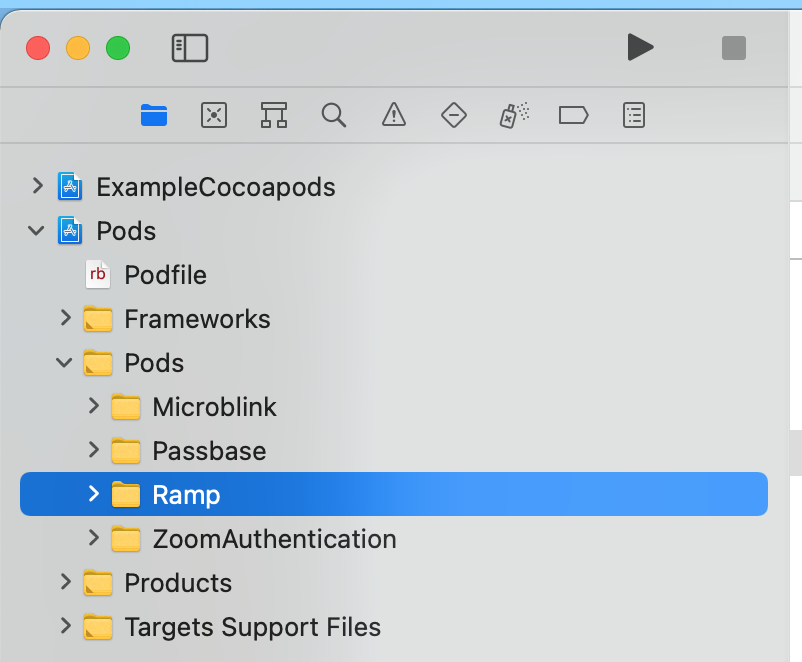
Now you should see Ramp Network directory in project navigator and be able to use Ramp Network in your code.
Project setup
After integrating Ramp Network iOS SDK, you need to adjust your app's permissions.
Ramp Network performs Know Your Customer process. In order to make it work, you have to add app permissions for Camera Usage and Photo Library Usage.
Usage
After successful integration and setup, you are ready to add Ramp Network into your app!
Let's go through all the building blocks of the library and then we will look into a simple example.
struct Configuration
This configuration structure contains all the information you can customize before opening Ramp Network. All the parameters are optional. Name of each of them should be self-describing, but if you have any doubts, refer to the Ramp Network configuration documentation. You can create it using a memberwise initializer or modify any of the parameters later on.
struct Configuration {
   var swapAsset: String? = nil
   var offrampAsset: String? = nil
   var swapAmount: String? = nil
   var fiatCurrency: String? = nil
   var fiatValue: String? = nil
   var userAddress: String? = nil
   var hostLogoUrl: String? = nil
   var hostAppName: String? = nil
   var userEmailAddress: String? = nil
   var selectedCountryCode: String? = nil
   var defaultAsset: String? = nil
   var url: String? = nil
   var webhookStatusUrl: String? = nil
   var finalUrl: String? = nil
   var containerNode: String? = nil
   var hostApiKey: String? = nil
   var defaultFlow: Flow = nil
   var enabledFlows: Set<Flow> = nil
   var offrampWebhookV3Url: String? = nil
   var useSendCryptoCallback: Bool? = nil
}

public extension Configuration {
    enum Flow: String, CaseIterable, Decodable {
        case onramp = "ONRAMP"
        case offramp = "OFFRAMP"
    }
}
class RampViewController��
This is the main view that you present to your user. You should initialize it using RampViewController.init(configuration: Configuration). This method will throw an error if Configuration is invalid. To receive callbacks from Ramp Network, set the delegate variable of Ramp Network view controller to a class that conforms to RampDelegate protocol.
To present the Ramp Network view controller, use UIViewController.present(_:animated:completion:) method. This is the only supported method - if you use any other, some aspects of Ramp Network may not work.
protocol RampDelegate
There are three required methods to implement in RampDelegate:
func ramp(_ rampViewController: RampViewController, didCreatePurchase purchase: RampPurchase, , purchaseViewToken: String, apiUrl: URL)
func ramp(_ rampViewController: RampViewController, didCreateOfframpSale sale: OfframpSale, _ saleViewToken: String, _ apiUrl: URL)
func ramp(_ rampViewController: RampViewController, didRequestOfframp payload: SendCryptoPayload, responseHandler: @escaping (SendCryptoResultPayload) -> Void)
func rampDidClose(_ rampViewController: RampViewController)
ramp(_:didCreatePurchase:) is called when a purchase is created, and returns a RampPurchase struct, containing all the information about it, purchase view token and API URL. All fields of the RampPurchase structure are described in the documentation
ramp(_:didCreateOfframpSale:) is called when a off-ramp sale is created, and returns a OfframpSale struct, containing all the information about it, sale view token and API URL. All fields of the OfframpSale structure are described in the documentation
ramp(_:SendCryptoPayload:) is called when a user clicks Send with your wallet button to initialize crypto transfer. SendCryptoPayload is a struct that contains assetInfo: AssetInfo, amount: String and address: String - address where the funds should be send.
rampDidClose(_) is called when Ramp Network finishes the flow and can be closed. If you used one of the recommended methods for presenting the Ramp Network view controller, it will close itself. Otherwise, you are responsible for closing the view.
Integration example
Let's look at a simple example. This view controller code is fully functional - just connect @IBOutlet and @IBAction to corresponding UI elements. You can build on top of that, customizing configuration and reacting to events however you like.
Some payment methods redirect user to an external app - Safari or, if available, a payment provider's app (Revolut, Monzo, etc.). To redirect the user back to your app after the payment, you can set a custom URL scheme for your app and then, pass the scheme to Configuration struct’s deepLinkScheme property.
import UIKit
import Ramp

class ViewController: UIViewController {
   @IBOutlet weak var emailTextField: UITextField!

   @IBAction func showRamp(_ sender: UIButton) {
      var configuration = Configuration()
      configuration.userEmailAddress = emailTextField.text
      configuration.enabledFlows = [Configuration.Flow.onramp, Configuration.Flow.offramp]
      let ramp = try! RampViewController(configuration: configuration)
      ramp.delegate = self
      present(ramp, animated: true)
   }
}

extension ViewController: RampDelegate {
   func ramp(_ rampViewController: RampViewController, didCreatePurchase purchase: RampPurchase) {}
   func ramp(_ rampViewController: RampViewController, didCreateOfframpSale sale: OfframpSale) {}
   func ramp(_ rampViewController: RampViewController, didRequestOfframp payload: SendCryptoPayload) {}
   func rampDidClose(_ rampViewController: RampViewController) {}
}
This code will allow you to get a user's email address from a text field and pass it to Ramp Network during initialization along with their country code. At this stage, your integration is almost ready - all that's left to do now is to get an API key and add it to your configuration. You can read more about Ramp Network API keys and learn how to get them here.
If you want to provide the best off-ramping (selling crypto) experience to your users, we recommend to take advantage of the Native Flow. Implementation of the native flow may be required in some native mobile apps. You can see more details here.